View the list of administrative tutorials below. Click on a topic of choice to view instructions.
CONTENT - MENU MANAGEMENT
This section covers management of your website MENU page and related functions.
1. In the left column menu click on MENU SPECIALS, then locate the special you wish to edit and click to edit it.

2. Click into the content area and edit the special as follows:
- Type in or copy / paste your item. Ensure there is a line break between each item title and its description (if any).
- Select the entire item title line and from the “paragraph” drop down menu (left of B), select “Heading 4”.
- Now select just the price within that line and click the “B” button to bold it.
3. Scroll up and in the right column click the ‘UPDATE’ button to finish.
1. In the left column menu click on PAGES, then locate the MENUS page and click to edit it.
2. Scroll down to the sections area of the MENUS page, and click to expand (or collapse) the section you want to update.

3. After expanding the section you wish to edit items, mouse over the text area of choice and click on the edit icon and edit as follows:
- Type in or copy / paste your item. Ensure there is a line break between each item title and its description (if any).
- Select the entire item title line and from the “paragraph” drop down menu (left of B), select “Heading 4”.
- Now select just the price within that line and click the “B” button to bold it.

4. Scroll up and in the right column click the ‘UPDATE’ button to finish.
1. In the left column menu click on PAGES, then locate the MENUS page and click to edit it.
2. Scroll down to the sections area of the MENUS page, and click to expand (or collapse) the section you want to update.
3. After expanding the section you wish to edit items, mouse over the text area of choice and click on the edit icon, edit as desired, then click the ‘SAVE’ button.

4. Scroll up and in the right column click the ‘UPDATE’ button to finish.
1. In the left column menu click on PAGES, then locate the MENUS page and click to edit it.
2. Scroll down to the sections area of the MENUS page, and click to expand (or collapse) the section you want to update.
3. After expanding the section you wish to add an image to, locate an existing image widget in that section, mouse over it, click on the copy icon, then drag and drop it into the location you want it to appear.

4. Click on the edit icon, then scroll down and click on the green + icon to open the media library.
5. From the ‘Upload files’ tab, click the “select files” button to locate your image, locate it then click “Open”.
6. After it finishes uploading it will be auto selected. In the right column click into the “Alt Text” field and add the name you want to be displayed below it. Repeat for the “Captions” section, then click the “Set image” button at the bottom of that column.
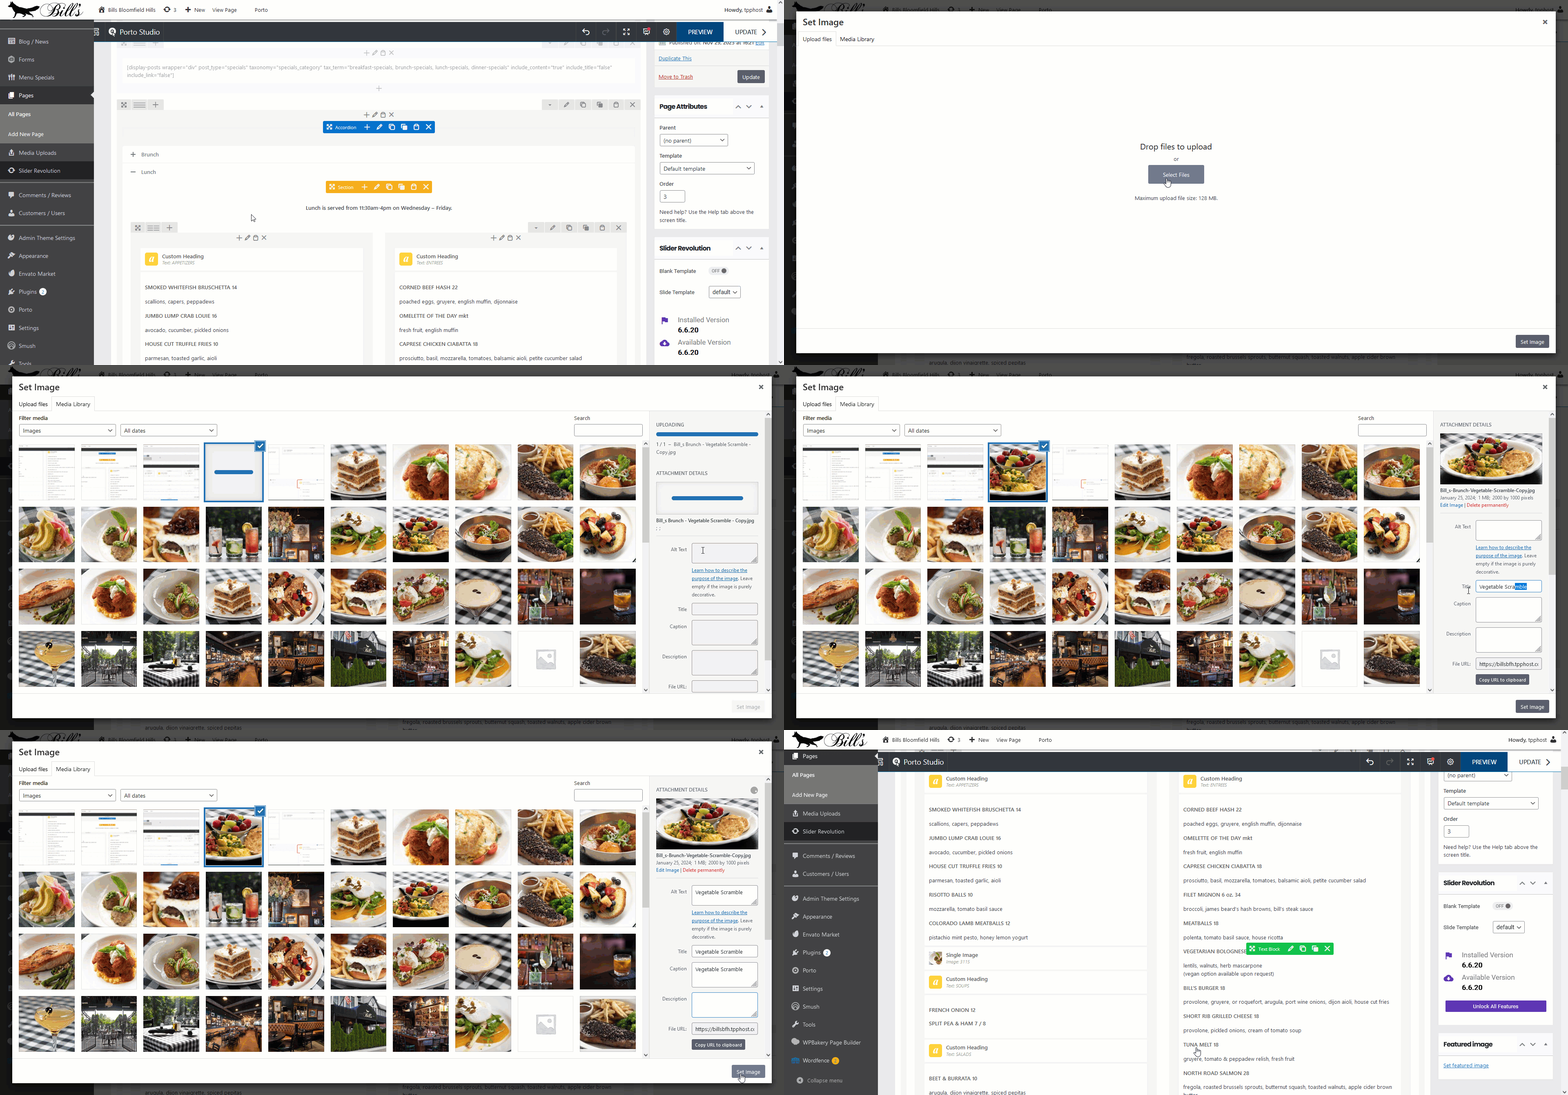
7. Scroll up and in the right column click the ‘UPDATE’ button to finish.
1. In the left column menu click on PAGES, then locate the MENUS page and click to edit it.
2. Scroll down to the sections area of the MENUS page, and click to expand (or collapse) the section you want to update.
3. After expanding the section you wish to edit items, locate the image you wish to replace, mouse over it, click on the edit icon, then scroll down and click on the green + icon to open the media library.
4. From the ‘Upload files’ tab, click the “select files” button to locate your image, locate it then click “Open”.
5. After it finishes uploading it will be auto selected. In the right column click into the “Alt Text” field and add the name you want to be displayed below it. Repeat for the “Captions” section, then click the “Set image” button at the bottom of that column.
6. Scroll up and in the right column click the ‘UPDATE’ button to finish.
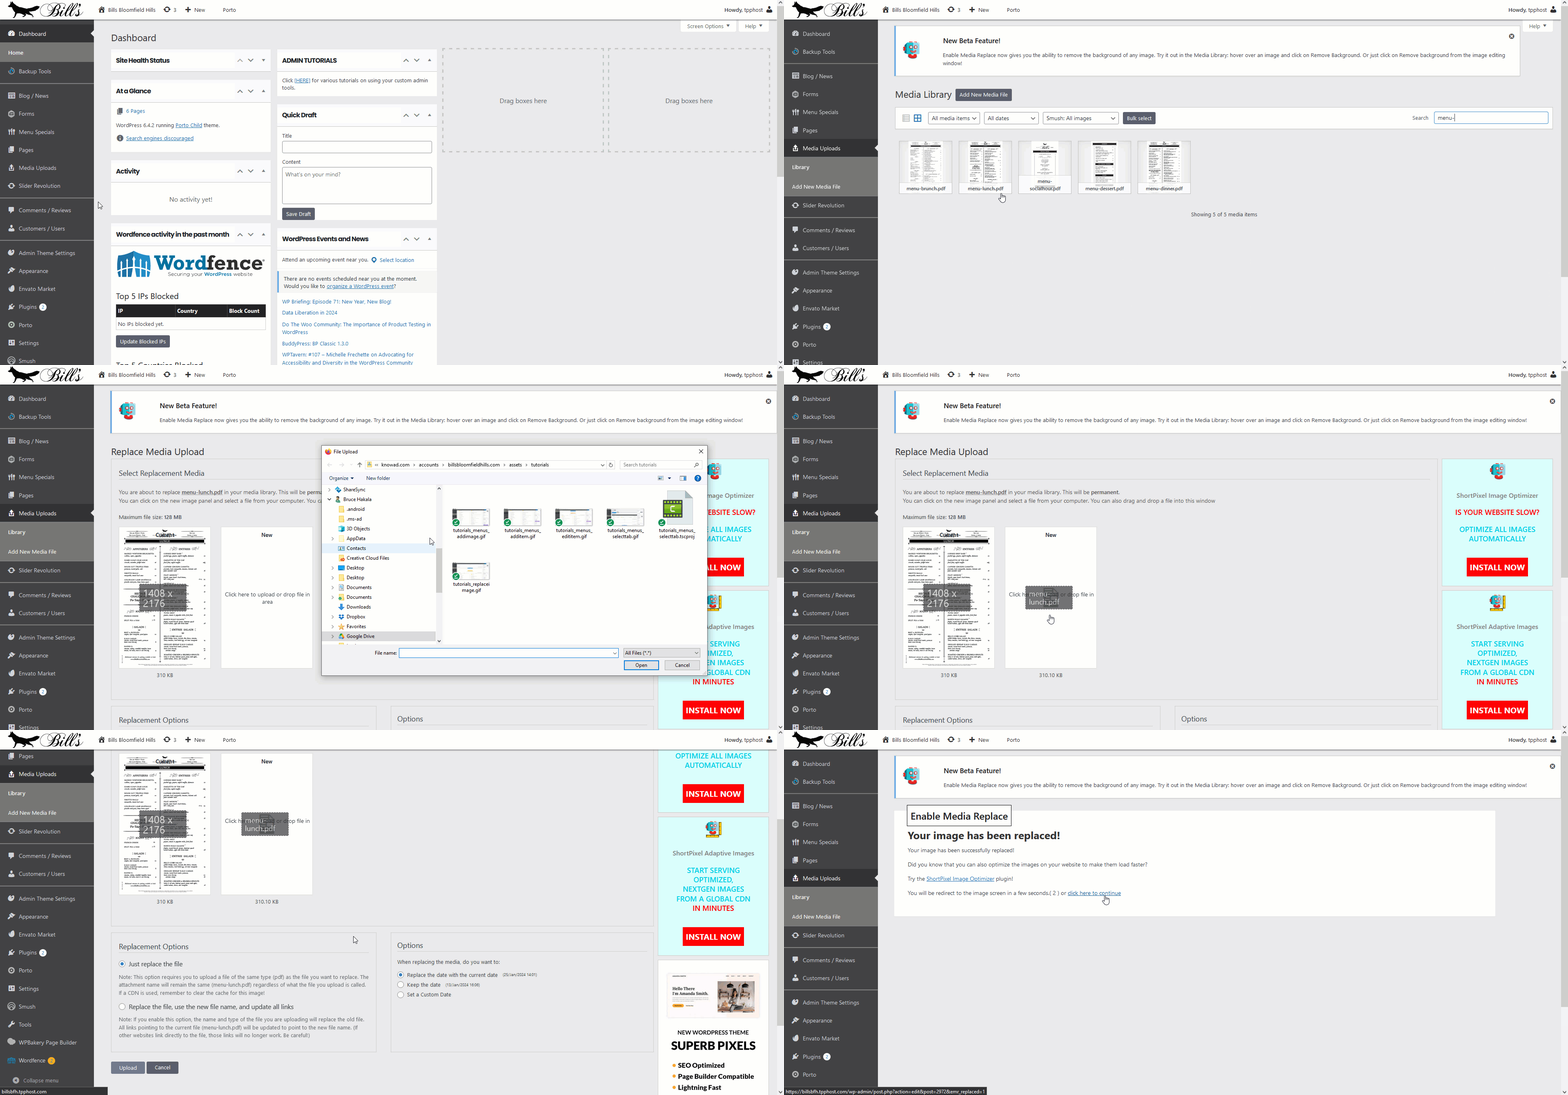
To make this process as easy as possible for you to update your menu PDFs, we recommend keeping the file names the same when you create new ones. The existing ones are named as follows:
- menu-brunch.pdf
- menu-lunch.pdf
- menu-dinner.pdf
- menu-socialhour.pdf
- menu-dessert.pdf
1. On the left column menu, click on MEDIA UPLOADS.
2. In the search bar on the top right, type in “menu-” and click to search. You will see your menu PDFs.
3. Click on the one you wish to replace with an updated version, then on the right side click on the ‘UPLOAD A NEW FILE’ button.
4. Follow the instructions on screen to upload a replacement menu PDF, and set the options on bottom as follows:
- Replacement Options: If you are using same file name (suggested), then select “Just replace the file”. If you are using a different file name, then select “Replace the file, use new file name, and update all links”.
- Options: Set to “Replace the date with the current date”.